.png?width=300&height=300&name=worflow-buider%20(4).png)
Highly configurable workflow building tool to accelerate and automate your workflows.
The Business Process Builder Tool enables administrators to create highly configurable and bespoke workflows tailored to your exact needs.
The business process workflow builder is not for developers; The tool is aimed at end-user managers or administrators who have in-depth knowledge of the business' requirements. The business process workflow builder tool enables you to map workflows and then configure each stage of the workflow according to your needs.
Using this unique Aproove Work Management tool is simple, allowing the user to draw a workflow diagram and set up the workflow route using the arrows to join the stages together. The circular box is the start point of the workflow, and the user can color and name the steps to identify each stage quickly.
Workflow steps can loop based on decisions, and you can add actions and API callbacks into the workflow, between any of the steps.
(Click here to learn more about Trigger and Actions.)
See below for a closer look at the options available when creating a workflow.
(Please note this is just an overview, not a definitive training document)
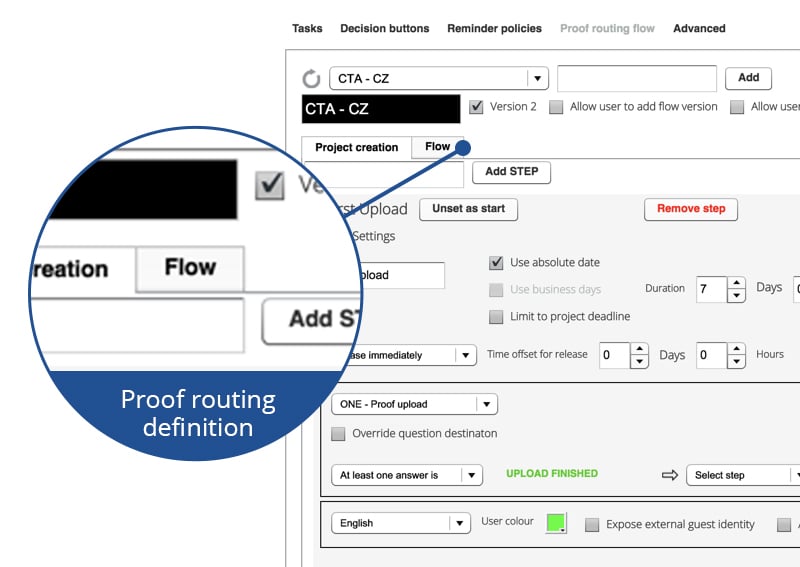
The administrator then starts to build the workflow by adding as many steps as required and joining them using the decision routes. The workflow can also contain loops. Workflow builder will let you name the steps exactly how you want.
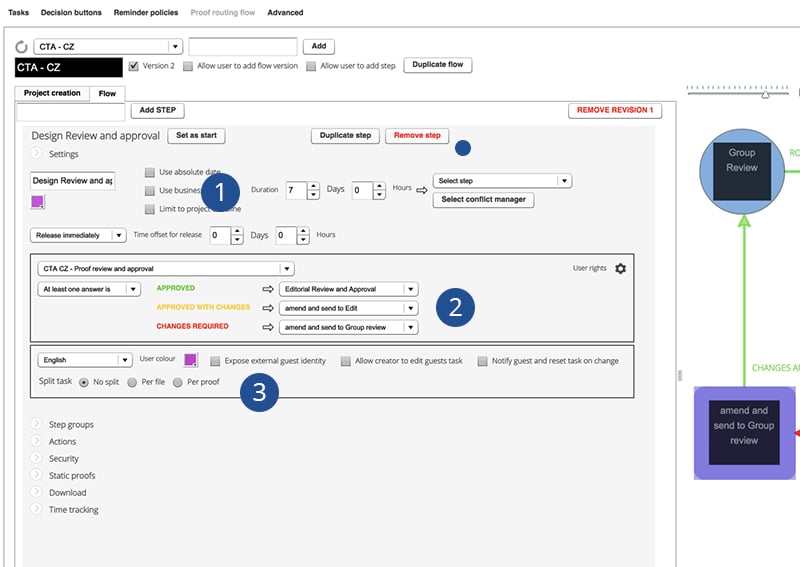 Each step is now ready to be configured -
Duration Settings:
Setup the desired step duration settings and rules, assign a conflict manager (if necessary), and define the step release rules. Decision Bindings:
Define what decision each of the arrows represents (the user can add as many bespoke decision buttons as necessary, and these will appear in the interface, at any step defined in the workflow builder).
Proof Routing Behavior:
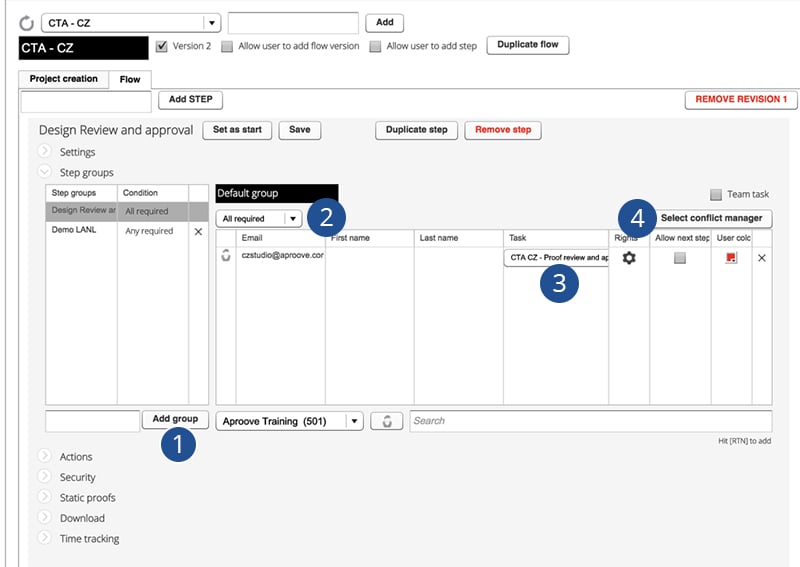
Define Step Groups:
Assign the users and groups you want in the step Define output rules:
Now the user groups are defined; you can decide if you want any rules to apply on the step. For example, only one user from this group needs to make a decision, or everyone needs to make a decision, etc. Workflow builder will allow you to define a group and make it a "team task" which allows any member of that team to assign and complete the task.
Override user task:
Define if you want to allow designated users to overrule or override this user or group task/s, for example, you can assign a different task to members outside the decision process of that step.
Define Conflict Manager:
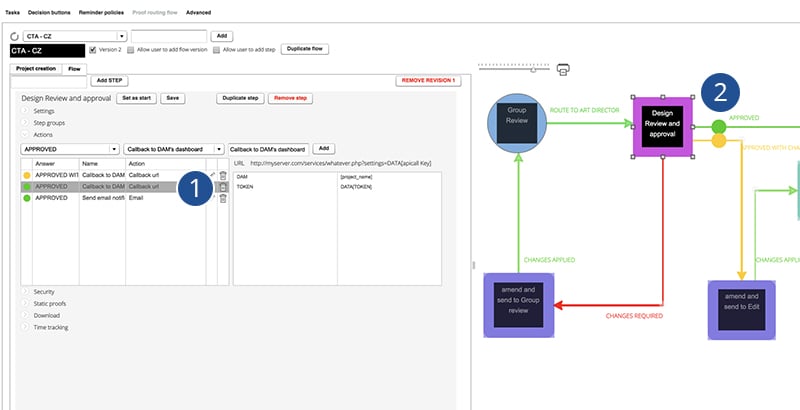
An unlimited amount of Trigger and Actions can get applied between any of the steps, which will automate your workflow even further.
Learn more about Trigger and Actions.
Action type on a decision:
Specify what decisions will trigger the action to execute.
In the example above, a decision of "Approved" will trigger an action to make an API call back to a 3rd party Digital Asset Management system, but triggers can be many things such as moving files, archiving a job, etc.
Actions:
As you define your Actions, small circles will appear on the lines coming from the step that you applied them on. This visually indicates where your actions appear in the workflow.
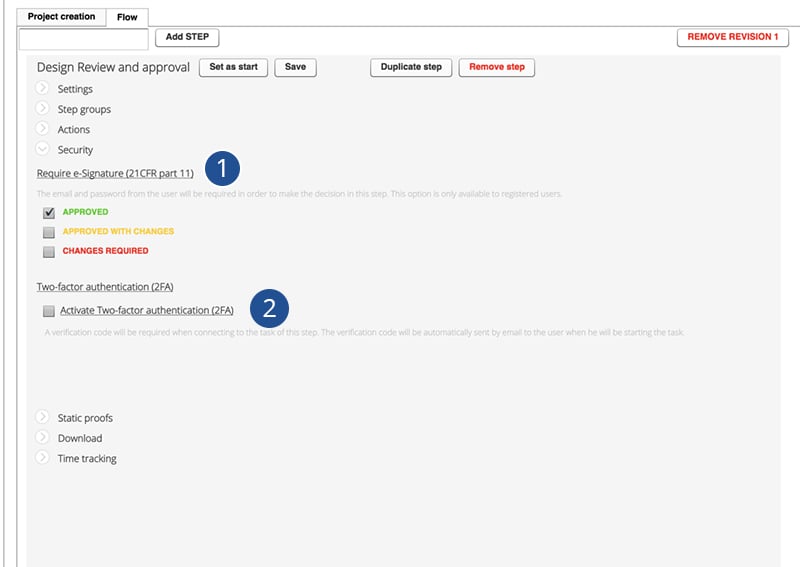
Electronic Signature Settings:
Specify if you want to apply e-signature (21CFR part 11) on any decision, on any step in the workflow. This is often a requirement for regulated industries like pharma, FMCG, or labeling.
Two Factor Authentication: (2FA)
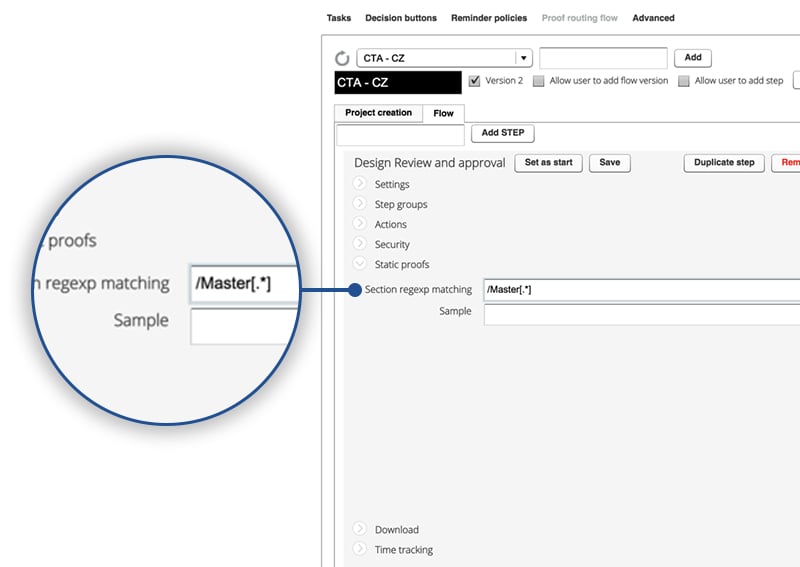
Define matching section for reference proofs:
Should you want your workflow to link to any master or reference document/s, regular expressions can get applied so that your naming convention will define your proofs link to the master file or any specific project or section.
Drive path definition:
Should you require any file downloads in any of your steps, you can define the path or use a regular expression that will route the user download request to the correct file/s.
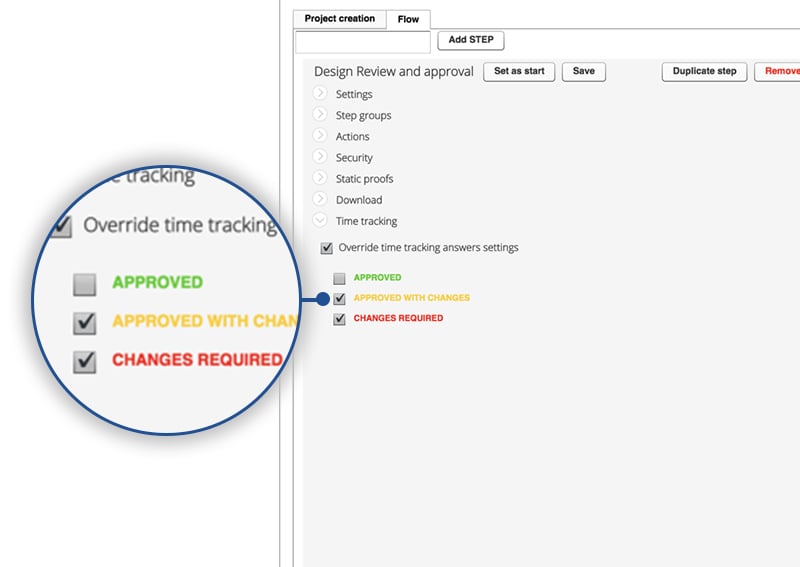 Define timesheet input: