*Needs Enterprise Edition **Needs API Addition
It is possible to use just one, two, or all five of these methods depending on your requirements. The project creation wizard can be hidden from view if that is a preference.
Project Creation Wizard
When a user clicks on the "Create Project" button, the project creation wizard is launched, and the user is asked the following:
The Basics Your desired project name
A project type (are you reviewing catalog pages or videos etc.)
A project start and deadline date
Add Files
Now the user can add files from any of the listed sources:My Computer (Navigate your local computer's filesystem)
Web Pages (Enter a URL or any website you want to add in your project)
Dropbox*
Box*
OneDrive*
Google Drive*
Guest Upload (This option allows you to request another user to upload proof/s)
* If you are not already connected, the connection wizard will be launched so that you can connect to your cloud account/s to Aproove WM.
Users can upload files from multiple different sources and even task another user or guest to upload proof/s for them.
Add Reviewers
Now the user can add users to the proof. Clicking on "Add Users" accesses the user's contacts. The contact list contains all your teammates plus any other external users that you added previously. The smart address book automatically adds users if they do not already exist in your contact list. By default, the reviewers get added to Step 1, but you can create as many steps as you require.
Proof permissions and tasks
As the users get added, you assign them tasks and set up what notifications you want them to receive, and in what frequency.
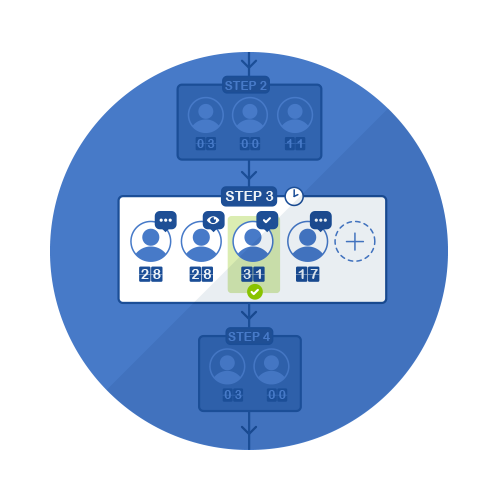
You have the option to assign any number of users the "route to the next step" (if the workflow has two or more steps). For example, you may set one of your three reviewers to be the "route to the next step." When that user completes the task, the project moves to the next step, even if the other two reviewers have not completed the task.
Each step has options which can get applied on a per-step basis, such as:
Steps
Once the first step is complete, you can rename it to something appropriate and even color code the step/stage. Now you can create additional steps/stages depending on your workflow requirements by repeating the above.
*Please note that Aproove Work Management allows a single user to appear in multiple steps of the workflow, which is a restriction in many other solutions.
Launch Project
Now all you need to do is launch your project. First, we will check all your settings and visually warn you if any mistakes get found and highlight them with a warning triangle. (e.g., you forget to add a role to a user)
Save your configuration
Once you have set up a project, you can save the configuration settings, and next time select your named project template, which contains the pre-defined parameters you previously setup. It is typical to have several templates for different projects, which can be easily selected and tweaked each time you create a new project.
When you launch the instant share, you have a range of options available such as;
Of course, you can also save any settings as a template for easy selection next time.
Once the user gets invited via the instant share, it will be logged in the project dashboard with all the other pre-defined steps.
This time-saving feature allows for quick and easy invites without the need to navigate back to the project configuration setup. Let Aproove WM automatically adjust the back end settings once you have sent your instant invite.
Guest Users can only enter the application via an invitation or @mention.
Guest User limitations are:
Guest users will only be able to carry out the task/s assigned to them by a registered user. For example, a guest user could get tasked to upload a file or annotate a proof.
The email link the guest user is sent via email contains access to the specific task requested with enough permissions automatically granted to carry out the task.
Having the ability to invite guest users is extremely powerful; it allows registered users to invite 3rd party stakeholders into a project even if they do not have a user account. This flexibility is beneficial when you need collaboration from an infrequent user, but do not want to add them permanently.
Guest users are unlimited and free of charge. Only registered users who have a login to Aproove are classed as a paid user.
The cropped content review feature empowers you to share cropped content which can be extremely useful for many different reasons such as;
To share cropped content, you need to:
Hit share on your project
Select the page or video in your project that you wish to share
Click on "Set crop" button
Highlight the area you want to share
Add the recipient and fill out any other required details such as deadline,
custom message, and expiry date.